Beginner Yoga Routine: When Beginner Content Feels Too Hard (Start From Where You Are)
Table of Contents
- Why 'Beginner' Yoga Routines Feel Too Advanced for Absolute Beginners and What You Can Do
- Beginner yoga poses for back pain relief
- Beginner yoga poses for stress relief & anxiety
- Beginner yoga poses for flexibility & mobility
- Beginner yoga poses for balance & strength
- Your Personalized Beginner Yoga Routine Builder
- How Yogaia Helps You Progress Safely Through These Modifications
- FAQs
A lot of beginner yoga routines are difficult for true beginners. They assume strength and flexibility levels that take a while to develop. That gap is why many people quit in the first session
Here’s what most yoga content doesn’t teach you: you probably quit early because the routine was built for someone with some experience, not a true beginner. And because yoga poses are so different from other forms of exercise, even people who are otherwise fit can struggle with routines as “simple” as Downward Dog.
This guide takes a different approach. You’ll find “pre‑beginner” movements using walls and chairs that bridge the gap to standard beginner yoga poses. You’ll also see poses grouped by what you want to focus on; whether that’s easing back discomfort, unwinding stress, improving flexibility, or sharpening your balance.
You'll learn modified versions of essential poses, the build-up movements that make them accessible, and which poses match your specific goal. The routines in this guide are for true beginners, with limited flexibility, shaky balance, and those who sit behind a desk all day. If that sounds like you, you’re in exactly the right place.
Why 'Beginner' Yoga Routines Feel Too Advanced for Absolute Beginners and What You Can Do
Most “beginner” yoga assumes you can already touch your toes, hold a solid plank, and balance on one leg. In reality, those skills come after regular practice, not before it. Many true beginners simply don’t yet have the joint mobility, core control, or balance that most of these “basic” sequences require.
The 30‑day beginner challenges on YouTube make this gap obvious. Instructors flow quickly through sequences with little time to check your form. Modifications get mentioned in passing and then skipped over. You’re expected to somehow know how to adjust when your hamstrings lock up or your wrists start to complain. Most people don’t, so they either grind through with shaky form or shut the video off, feeling like they’ve failed.
Studio classes introduce a different set of hurdles. Group sessions often move at the pace of the room’s average ability, not the slowest body in it. A lot of teachers rarely have time to stop an entire flow to troubleshoot one person’s hip or shoulder alignment. It’s easy to get swept up in keeping pace, ignore how your body feels, and walk out sore and discouraged.
A lot of general fitness apps and strength programs don’t fully bridge the gap either. Squats and push‑ups can build muscle, but they don’t automatically create the hip, spine, and shoulder mobility that yoga asks for. You might get stronger and still find it uncomfortable to sit cross‑legged or rotate your torso without strain.
What’s missing from these options?
A clear build‑up path: movements that gently prepare your body for standard poses instead of throwing you right into them.
Goal‑based organization: so you can choose routines by the problem you want to solve, whether it’s chronic back pain, stress, limited range of motion, or poor balance — not a generic “day 7 beginner” label.
The routines in this guide are built around that structure. Every pose includes three options: a modified version using props like walls and chairs, a build‑up move that trains the exact strength and range of motion you need, and the classic pose you’re working toward. You’ll always know what’s appropriate for you each day and what you’re progressing to next without uncertainty.
Looking to try a yoga app that meets you at your current fitness level? Check out our best yoga apps for beginners guide.
Beginner yoga poses for back pain relief
Back pain gets worse when you sit for long periods without strengthening your back muscles. Try these three poses to loosen the muscles that pull your lower back out of alignment and lengthen your spine safely. For a longer routine, you can also explore these 13 stretches for lower back pain.
Child's Pose (Balasana)
Child’s Pose gently stretches your lower back and hips while releasing tension along your spine.
Modified: Kneel with your knees wide and place a pillow or folded blanket under your torso. Rest your chest on the support and let your arms reach forward or relax by your sides. The prop takes the pressure off your hips and ankles but still gives you the same spinal release.
Build up: Sit in a chair and fold forward from your hips, letting your chest rest on your thighs and arms hang toward the floor. Hold for 30 seconds, breathing into your lower back.
Standard: From kneeling, sit your hips back toward your heels, extend your arms forward, and rest your forehead on the mat. Hold for 5–10 slow breaths.
Safety: If you have knee pain or are in the second or third trimesters of pregnancy, work with a higher support or choose another pose.
Cat Cow Stretch (Marjaryasana Bitilasana)
Cat–Cow is a simple way to get your whole spine moving and ease stiffness through your back, neck, and shoulders.
Modified: Sit in a chair with your feet flat and hands on your knees. For Cat, round your spine and let your chin drop toward your chest. For Cow, gently arch your back, lift your chest, and look forward. Move slowly with your breath.
Build up: Stand facing a wall with your hands at shoulder height. Press into the wall as you round your spine for Cat, then soften your belly and lift your chest for Cow. The wall gives you balance while you learn the movement pattern.
Standard: Start on hands and knees in tabletop position. Inhale as you drop your belly and lift your gaze for Cow. Exhale as you round your spine and tuck your chin for Cat. Continue for 5–10 rounds at a comfortable pace.
Safety: If your wrists hurt, use the chair or wall version, or place yoga blocks under your hands. You can also pad your knees with a folded blanket for extra comfort.
Bridge Pose (Setu Bandhasana)
Bridge strengthens your glutes and back while opening tight hip flexors that shorten from prolonged sitting.
Modified: Lie on your back with your feet flat. Press gently through your heels to lift your hips a few inches. For more support, place a yoga block under your sacrum and rest there.
Build up: Lying on your back with knees bent, practice pelvic tilts by pressing your lower back into the floor and then releasing. Repeat about 10 times to wake up the muscles you’ll use in Bridge.
Standard: Lie with your knees bent, feet hip‑width apart, and close to your glutes. Press into your feet to lift your hips toward the ceiling and, if it feels okay, clasp your hands underneath you. Hold for about 5 breaths, then lower slowly.
Safety: If you have neck issues or high blood pressure, skip the full lift and stick with a low, supported version on a block.
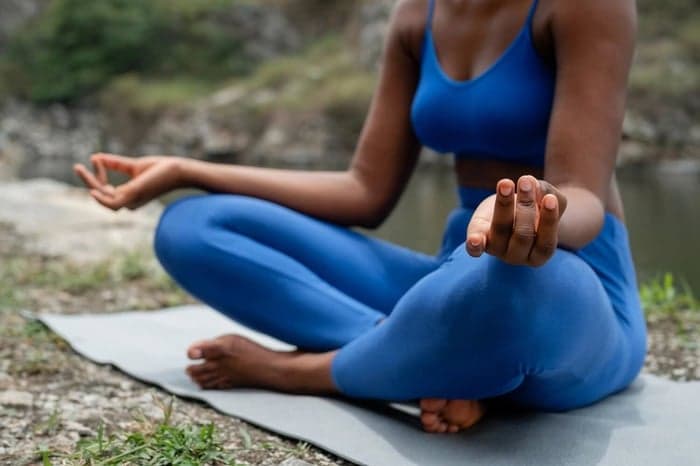
Beginner yoga poses for stress relief & anxiety
Stress shows up in your body as much as in your thoughts: tight shoulders, shallow breathing, a nervous system that never quite powers down. The poses below help shift you into a calmer state by easing physical tension and slowing your breath. They work whether you have five minutes between meetings or twenty minutes before bed.
Legs Up the Wall (Viparita Karani)
This gentle inversion soothes the nervous system and eases tired legs and a tight lower back with almost no effort.
Modified: Lie on your bed and swing your legs up onto a headboard or a stack of pillows. Keep your hips on the mattress and let gravity do the work.
Build up: Lie on the floor with your calves resting on a chair seat so your knees are bent at about 90 degrees. You get many of the same circulation benefits without stressing your hamstrings.
Standard: Sit sideways against a wall, then swing your legs up as you lower your back to the floor. Adjust so your hips are as close as is comfortable, arms relaxed by your sides. Stay for 5–10 minutes, breathing slowly.
Safety: Avoid this pose if you have glaucoma, uncontrolled high blood pressure, or feel dizzy in inversions, and use a folded blanket under your hips or a pillow under your head if your back or neck feels strained.
Wondering if you're doing these poses correctly? Yogaia’s live classes take the guesswork out. Turn on your camera (if you want), and instructors watch your form in real time, offering gentle corrections as you move. You can filter classes by focus area: back pain, stress, flexibility, or balance—so you land on exactly what your body needs. Start your 14‑day free trial and join a live class where teachers help you find the right modifications.
Corpse Pose with props (Savasana)
Savasana helps your whole body wind down, making it easier for your nervous system to switch into rest‑and‑recover mode.
Modified: Lie on your back with a pillow under your knees to ease your lower back, and a small cushion or folded towel under your head. Add a light blanket if you tend to get cold.
Build up: Take a few slow, deep breaths. Inhale through your nose and exhale through your mouth. After several rounds, allow your body to settle and your breath to return to its natural rhythm.
Standard: Lie flat with your legs extended and arms resting comfortably at your sides, palms up. Let your feet roll outward, close your eyes, and breathe naturally for 5–10 minutes.
Safety: Adjust with props any time your back or neck feels uncomfortable; this pose is generally safe for all levels when supported well.
Seated Forward Fold (Paschimottanasa
Modified: Sit with your legs extended and place a rolled blanket or cushion under your knees. This slight bend helps release tension in your hamstrings and makes it easier to hinge forward from your hips while keeping your spine long.
Build up: Sit with your knees bent and feet flat. Hold behind your thighs and fold forward until your chest rests toward your legs. Gradually straighten your knees only as far as your hamstrings comfortably allow.
Standard: Sit upright with legs extended. Inhale to lengthen your spine, then exhale and hinge from your hips to reach toward your feet. Stay for 5–10 slow breaths.
Safety: Keep a soft bend in your knees if the backs of your legs feel tight, and avoid forcing yourself deeper or collapsing into a rounded spine.
Beginner yoga poses for flexibility & mobility
Tight muscles and limited range of motion can make even simple movements feel out of reach. The yoga poses in this section focus on the hips, hamstrings, and spine, the areas that stiffen most when you sit a lot. Work through them at your own pace, and feel free to explore our yoga for flexibility guide for more routines.
Downward
Modified: Stand behind a sturdy chair with the back facing you. Place your hands on the top of the backrest, then walk your feet back and hinge at your hips until your torso is roughly parallel to the floor, forming an L shape. Press your hands into the chair and gently draw your hips away from it to create length from your hands to your tailbone.
Build up: Start on hands and knees, tuck your toes, and lift your hips toward the ceiling while keeping your knees bent. Focus on creating length from your hands to your tailbone rather than straightening your legs.
Standard: From hands and knees, tuck your toes and lift your hips up and back, pressing your chest toward your thighs. Gently work your legs toward straight and press your heels toward the floor. Hold for about 5 breaths.
Safety: Skip or modify if you have wrist issues or uncontrolled high blood pressure. Keep your knees bent if your hamstrings are tight, and place blocks under your hands to reduce wrist pressure.
Standing Forward Fold (Uttanasana)
Standing Forward Fold lengthens your hamstrings, calves, and lower back while releasing tension through your spine and neck.
Modified: Sit tall on a chair with the soles of your feet firmly on the floor and your sit bones grounded on the seat. Place your hands on your thighs, then slowly hinge from your hips, sliding your hands down your legs as you fold forward. Let your head hang heavy so the weight of your skull gently lengthens the back of your body.
Build up: Keep your knees softly bent as you fold forward, allowing your torso to rest over your thighs. This helps protect your lower back and accommodates tighter hamstrings. Over time, you can work toward straightening your legs as flexibility improves.
Standard: Stand with your feet hip‑width apart. Exhale and fold from your hips, letting your head hang heavy. Bring your hands toward the floor, resting on your shins, blocks, or the mat—wherever is comfortable.
Safety: Bend your knees as much as you need; straight legs are not the goal with tight hamstrings. Avoid locking your knees, and come up slowly to prevent dizziness.
Low Lunge
Low Lunge opens your hip flexors, stretches the front of your back leg, and builds strength in your front thigh.
Modified: Lower your back knee onto a folded blanket or cushion. Place yoga blocks under your hands to bring the floor closer, so your torso can stay upright without strain.
Build up: From the modified position, keep your back knee down and focus on a gentle lunge with your chest lifted. Rest your hands on your front thigh for balance.
Standard: Step one foot forward between your hands, lift your back knee off the floor, and lengthen your back leg. Stack your front knee directly over your ankle and, if it feels steady, reach your arms overhead.
Safety: Keep your front knee aligned directly over your ankle, not drifting past your toes. Cushion the back knee if the floor feels hard, and ease into a deeper lunge gradually.
Beginner yoga poses for balance & strength
Balance and strength develop together; it’s hard to hold a pose steady without the muscle control to back it up. These three poses train both at once, starting with variations that let you practice safely while your body catches up.
After you’ve nailed the basics, explore more balance-building yoga poses for continued progression.
Tree Pose (Vrksasana)
Tree Pose develops single‑leg balance and strengthens your ankles, calves, and deep core stabilizers.
Modified: Sit tall near the front of your chair with one foot planted and the other sole resting against your inner thigh. Rest your hands on your knee or at your heart, depending on what feels more stable.
Build up: Stand on your right leg. Bring your left foot in towards your right calf. Left foot toes can gently touch the floor for extra balance. Bring your hands to your heart or reach your arms overhead. Hold for about 5 breaths, then switch sides.
Standard: Stand on one leg and press the sole of your lifted foot into your inner thigh (or calf), toes pointing down. Bring your hands to your heart or reach your arms overhead. Hold for about 5 breaths, then switch sides.
Safety: If you have ankle issues or significant balance problems, keep your toes on the ground and use a wall or chair until you feel secure.
Plank modifications
Plank builds core strength, shoulder stability, and full-body endurance, which are the foundations for many yoga poses.
Modified (Knee Plank): Start on hands and knees. Walk your hands a little forward and lower your hips until your body forms a straight line from head to knees. Gently draw your belly in and hold for about 10 seconds.
Build up (Forearm Plank): Lower onto your forearms with elbows under shoulders. Step your legs back, tuck your toes, and lift your hips so your body forms a straight line from head to heels. This takes pressure off the wrists while keeping the core work
Standard (Full Plank): From hands and knees, step your feet back and straighten your legs. Stack shoulders over wrists, engage your core, and keep your body in one long line. Start with 10‑second holds and build from there.
Safety: If you have wrist pain, choose the forearm plank instead of weight‑bearing on your hands. Keep your core engaged and gently draw your ribs in towards your spine so your lower back doesn’t sag.
Chair Pose (Utkatasana)
Chair Pose strengthens your thighs, glutes, and core while building the lower body endurance you need for longer standing sequences.
Modified: Stand with feet together or hip‑width apart. Bend your knees slightly and sit your hips back as though into an invisible chair. Bring your palms together in front of your chest and keep your chest lifted. Hold for 5 breaths.
Build up: Practice a shallow squat, lowering only a few inches. Keep your weight on the full sole of your feet and try to not put your entire weight on your heels.
Standard: Stand with feet together or hip‑width apart. Bend your knees more deeply, sit your hips back as though into an invisible chair, and reach your arms overhead. Hold for about 5 breaths.
Safety: Push your hips back so your knees stay in line with your toes and don’t roll inward or extend beyond them. If balance feels shaky, use a wall behind you or a chair beside you for extra support.
Your Personalized Beginner Yoga Routine Builder
Now that you've seen the modified and build-up versions of each beginner yoga pose, here's a quick reference you can use according to your specific needs. Pick your main goal, then choose the modification level that your body can handle.
Goal | Modified (Start Here) | Build-Up (Progress To) | Standard Beginner |
Back pain relief | Supported Child's Pose, Seated Cat-Cow, Block-supported Bridge | Chair Forward Fold, Wall Cat-Cow, Pelvic Tilts | Child's Pose, Cat-Cow, Bridge Pose |
Stress relief | Legs on Couch, Propped Corpse Pose, Bent knee Forward Fold | Calves on Chair, Corpse, Bent-Knee Forward Fold | Legs-Up-the-Wall, Corpse Pose, Seated Forward Fold |
Flexibility | Wall Downward Dog, Chair Forward Fold, Blanket-supported Low Lunge | Bent-Knee Downward Dog, Half-Lift Forward Fold, Kneeling Low Lunge | Downward-Facing Dog, Standing Forward Fold, Low Lunge |
Balance & strength | Wall-supported Tree, Knee Plank, Chair-assisted Chair Pose | Toe-down Tree, Forearm Plank, Shallow Squat | Tree Pose, Full Plank, Chair Pose |
Let’s say your goal is stress relief. You can start in the Modified column, and practice each pose there for 1–2 weeks, or until you can hold it without shaking or straining. Then move into the Build‑Up column and, when that feels solid, into Standard Beginner. There’s no shame in staying with modified versions for months; some bodies adapt faster than others, and what really matters is consistency over intensity.
How Yogaia Helps You Progress Safely Through These Modifications
Form matters more than depth in every pose; good alignment builds strength, while sloppy positioning can create strain for you. Yogaia’s live classes let teachers watch your practice (if you turn your camera on) and offer real‑time corrections as you move through each modification.
Real-time guidance for your body
When your alignment drifts, or a modification needs tweaking during a live class, Yogaia’s instructors correct you in the moment. This keeps you from repeating the same mistake for weeks or being unsure about whether you’re holding the right form. Note that if your camera is on, only the instructor can see you, so it’s as private as it can get, while you still get the real studio-like benefits.
Yogaia offers 3,000+ live and on-demand classes for all experience levels. You can choose classes based on the difficulty level that’s comfortable for you, so you’re not thrown into routines your body isn’t yet ready for.
Here's what one Yogaia user has to say
"A couple of years ago, I had an accident where I took a hard hit to my left hip, shoulder, and head. It left my left side stiff and unbalanced. Alongside physical therapy, I used Yogaia's relaxing yoga, Yin, and meditation classes to regain balance. Over time, I gained flexibility and body control. I've learned to understand my body better. Through life's major twists and turns, I've often turned to Yogaia." — Arja, 67, member since 2015
Starting at 67 after an injury, Arja used modified versions that met her where she was, then progressed gradually. Her story shows what's possible, no matter your current fitness level and body’s limitations.
Ready to find yoga that meets you where you are?
Join thousands of members who use Yogaia’s live instruction and goal‑based class filters to progress safely. Start your 14‑day free trial and drop into live classes where instructors help you choose the right modification level for your body, whether you’re dealing with back pain, stress, limited flexibility, or balance concerns. You can end your trial anytime without a charge.
To ease in, try Yogaia’s 10‑minute Gentle Stretch for beginners—a slower‑paced class with modifications that’s designed to build confidence with accessible poses.
FAQs
How do I know which modification level to start with?
Start with the modified version of any pose using walls, chairs, or props. Progress to the build-up version when you can hold the modified pose for about 5 breaths without shaking or straining. Let stability, not ego, determine your decision.
What if I can't even do the modified versions?
That's completely normal and nothing to feel bad about. Start with the build-up movements first. They're specifically designed to prepare your body for the modified poses. If that still feels like too much, try these chair yoga poses as an even softer entry point.
How long should I stay at each level before progressing?
Many people spend 1–2 weeks at each level, but your body sets the pace. Progress when you can hold a pose without wobbling or gritting your teeth to get through it. There’s no downside to staying with modified versions for a few extra weeks if that’s what feels right for your body.
Can I mix modification levels (easy back poses + harder flexibility poses)?
Yes. Different parts of your body are at different stages. Your hips might need a gentler version of a pose, while your upper body might be okay with the full version. Adjust each pose to the area that feels weakest and let how you feel determine the level that works for you today.
Do I need to do ALL poses or just focus on my goal?
Starting with the three poses under your main goal is enough to see real progress. You can always add poses from other categories as your practice grows. Practicing short 10-minute sessions one to three times a week will do more for you than occasional hour‑long sessions that try to cover everything at once. As those sessions feel easier, you can gradually extend them instead of forcing a daily routine right away.
Is yoga safe if I have chronic conditions?
Talk with your healthcare provider before starting yoga if you live with any chronic conditions. Modified versions that use chairs and walls are gentle enough for many limitations, but your doctor can flag which poses to avoid: like inversions if you have high blood pressure or glaucoma, or deep twists with certain spinal issues.
What if I'm not flexible—can I still do yoga?
Yes. Flexibility is something yoga develops over time, not a requirement to begin. Every pose in this guide has a modified option using walls, chairs, or props so you can work within your current range of motion. Plenty of people start unable to touch their toes and gain mobility over months of steady practice.
What props do I need to get started?
You don’t need any special gear. A yoga mat is helpful but not mandatory for your first sessions. Everyday items work well as props: a folded blanket to cushion your knees, a sturdy chair for balance, and a belt or scarf in place of a yoga strap.